
How to Photograph Food for Your Menu
We walk you step by step through appetizing food photography for your menu, with the right light, plating and angles, from shooting with a phone to editing and uploading to the menu.
 Aurora YazılımEditorial team
6 min read
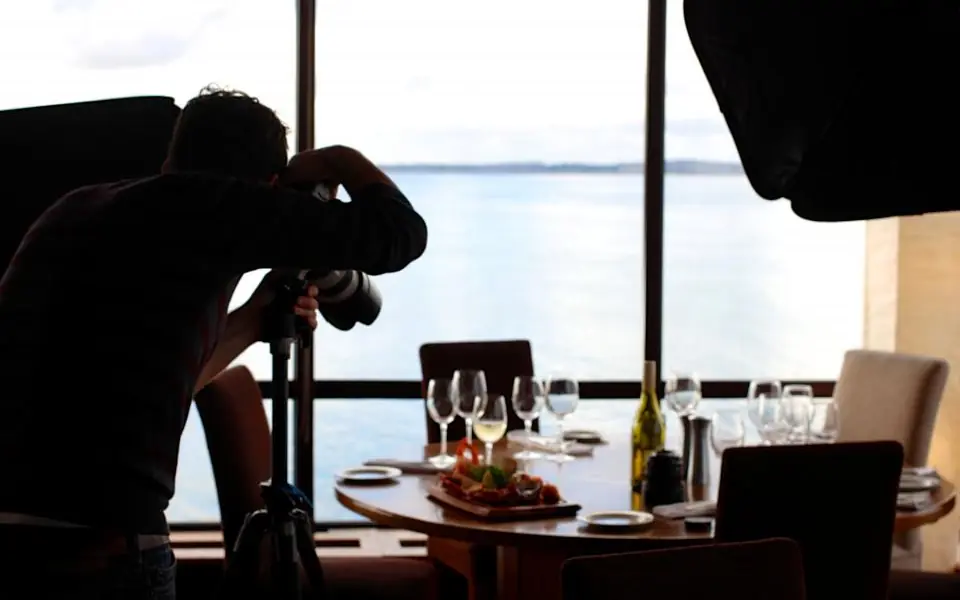
Good food photography rests on three things: soft natural light from the side, a simple background and an angle that suits the dish. Shoot the plate the moment it is served, with clean edges; photograph flat dishes from above and layered dishes from the side. Keep the same light and angle across the whole menu for a consistent look.
Why Do Menu Photos Matter?
A guest looks first at the photo, then the item name, and last the price. On digital menus this effect is even stronger; of two items side by side on a phone screen, the one with the better photo usually gets more attention. A menu photo is therefore not decoration but a sales tool.
But a good photo does not mean showing the food as something it is not. If the plate that reaches the table is smaller or different from the one in the photo, the guest is disappointed and may say so in a review. The goal is to show the food true to life, but at its best.
The techniques in this guide do not require professional equipment. Most current phones can take menu-quality photos with the right light and setup.
Light: Half the Job
The most decisive factor in food photography is light. Natural light, especially indirect daylight from a large window, shows the color and texture of food most naturally. Avoid hours when the sun hits directly and creates hard shadows.
The direction of the light matters too. Light coming from the side or slightly behind the plate brings out texture and shine; the sauce glistens and the crust of the bread stands out. Light from behind you flattens the food and can cast your shadow on the plate.
A whole menu usually cannot be shot in one go. If you will shoot on different days, use the same time, the same window and the same table setup; taking a few notes and sample frames with your phone makes it easier to recreate the same light next time.
- Turn off the restaurant's overhead lamps and yellow lights; colors get distorted when lights of different colors mix.
- Soften shadows by placing a white card or foam board opposite the light.
- Do not use the phone's flash; it gives a harsh, flat look.
- If there is no window, choose a wide, soft, single-color continuous light source.
Choosing the Right Angle
Every dish has an angle at which it looks best. Choosing the right angle brings out the dish's character.
| Angle | Which dishes | Why |
|---|---|---|
| From above (90°) | Pizza, breakfast plates, salads, mezze, bowls | Flat surfaces and arrangement are visible in full detail |
| From the side (0–15°) | Burgers, layered cakes, sandwiches, drinks | Height and layers come through |
| Diagonal (about 45°) | Main courses, pasta, meat plates | Closest to the angle from which the guest looks at the table |
Plating and Composition
For a photo, the plate is prepared a little more carefully than the serving plate, but the product stays the same. Clean the edges of the plate, wipe off sauce drips and add the garnish fresh. Small flaws get bigger in a photo.
A simple background makes the food stand out. A wooden table, a plain linen cloth or a matte stone surface suits most dishes. Patterned cloths, shiny plates and unnecessary items on the table distract.
Props
A fork, a folded napkin, a piece of the dish's main ingredient or a glass of a drink adds story to the photo. Proportion matters: a prop should complete the dish, not take its place.
Framing
Instead of putting the plate dead center, placing it on one of the imaginary lines that divide the frame into thirds gives a livelier image. For menu photos, though, consistency matters more; shooting all items at a similar size and in a similar position gives the menu a tidy look.
Timing
Food changes fast: salad wilts, foam collapses, sauce dulls, melted cheese hardens. So set up the light, angle and background first with an empty plate or a similar stand-in plate, and place the real food last, while it is hot. For hot dishes, backlight and a dark backdrop help capture steam; burst mode helps you not miss the few seconds of the window.
Food Photography With a Phone
A few settings noticeably improve food photography with a phone. Clean the lens before you start; a greasy lens from the kitchen makes the image hazy.
- Lock focus and exposure by tapping on the food; lower the brightness slightly if needed.
- Turn on the grid lines; it makes it easier to keep horizontal and vertical alignment.
- Use portrait mode carefully; it can blur the edges of the plate artificially.
- Steady your hands by resting your elbows on the table or using a small tripod.
- Shoot the same plate from several angles and distances; make the choice afterward.
Editing: Light and Natural
The aim of editing is to bring the photo closer to reality, not to change it. A white balance correction removes a yellow or blue cast, brightness and contrast are adjusted slightly and the framing is fixed. That is often all you need.
Exaggerated saturation, heavy filters and artificial colors make food look like plastic. Using the same editing settings across the whole menu makes even photos taken on different days look like part of one set.
Do not forget to reduce the file size before uploading to the menu. Large files straight from the phone make a digital menu slow to open. Images saved at a suitable size in a modern format such as WebP keep their quality and speed up the page; we cover this on our speed and performance management page.
Adapting for the Menu and Social Media
The same photo is used in different ways in different places. A square or horizontal crop is common on a digital menu, vertical on the Instagram feed, and 9:16 for Stories and Reels. Placing the food slightly inside the frame when shooting makes it easier to crop to different ratios later.
We covered how to place photos in a digital menu in our how to make a QR code menu guide, and the effect of a photo's position on sales in our menu design article. To tie these photos into a content plan on social media, see our restaurant Instagram guide.
Once the photos are ready, a QR code menu system that lets you update them with prices and descriptions from a single panel carries the work of the shoot to every table.
When to Get Professional Help
Shooting with a phone is enough for daily posts and small menus. But if the menu is being redesigned, many items will be shot to the same standard, or the photos will be used in print, on signage or in ads, a professional shoot makes a difference.
A professional shoot brings together lighting setup, food styling and consistent editing; the whole menu is completed to the same standard in one or a few days. For this you can use our product photography service, and our creative production support for promo videos and campaign visuals. It is also recommended to plan the visuals together with brand management so they match the brand's overall language.
Frequently Asked Questions
01What is the best time of day for food photography?
The best hours are when the sun does not shine directly inside and the light is soft and plentiful; in many venues this is before noon or the first hours of the afternoon. Planning the shoot before the service rush also lets the kitchen work comfortably.
02Can I use stock photos on a menu?
Not recommended. A stock photo does not show your plate; when the product that arrives at the table is different, the guest's trust is shaken. The image's license may also not always allow commercial use.
03Is making food look nicer for a photo deceptive?
Cleaning the plate, refreshing the garnish and using good light is not deceptive. Enlarging the portion, adding an ingredient that is not on the menu, or shaping the food with inedible materials misleads the guest and should be avoided.
04How many photos should I take?
Shoot each item from several angles and distances and pick the best. A good start is at least one main image for every item you will use on the menu, plus a vertical frame suitable for social media for featured items.
Food photography is possible even with a phone, with the right light, a suitable angle, a simple setup and a little but correct editing. Achieving consistency across the whole menu is the step that makes the biggest difference. To shoot your menu to a single standard and refresh it with appetizing visuals, explore our product photography service, and for video and campaign content, our creative production support.